Virtualizing Haiku in QtQEMU
Virtual instances of operating systems are perfect for all kinds of testing purposes that need to be done in a safe and isolated environment. Installing Haiku in a virtual machine is a solution for people who do not want to install it on their physical computers, but wish to become familiar with it.
This guide will describe the process of running Haiku in a virtual machine (VM) using QEMU 4.1.0 and an .ISO image file, with a Windows 10 host.
The latest .ISO image can be obtained here.
You can find the latest version of QEMU for Windows, Linux, and MacOS here.
In this guide, we will use QtEmu, an open source GUI front-end to spare us from having to remember the complicated arguments for the command line QEMU. The installer for the latest version of QtEmu can be downloaded here.
Go to section:
Part 1: Setting up QEMU and QtEmu
Step 1. Installing QEMU
After downloading the latest version of QEMU from the link mentioned above, open the installer and follow the instructions. The setup normally finishes in a few minutes.
Step 2. Installing QtEmu
QtEmu is an open source GUI front-end for QEMU.
After downloading the installer from the link above, run the setup and follow the instructions. This normally takes around 2 minutes.
The QtEmu icon should now appear on the Start Menu.
Step 3. Configuring QtEmu for QEMU
During the first run of QtEmu, you will have to configure the paths to QEMU in order for the program to run properly.
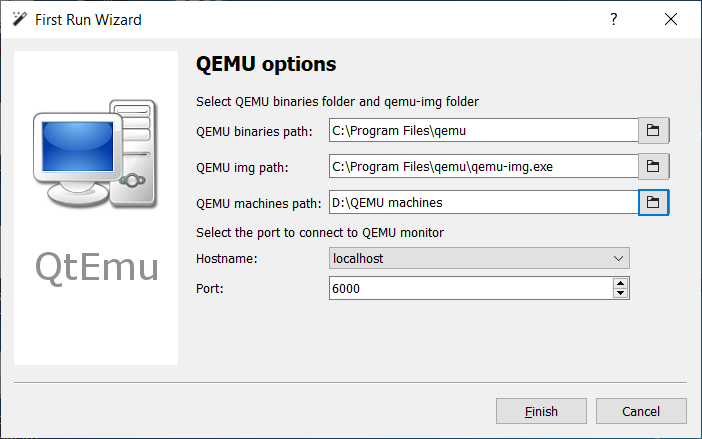
The “QEMU binaries path” is the folder where you installed QEMU, which is usually C:\Program Files\QEMU or C:\Program Files (x86)\QEMU.
The “QtEmu img path” is the path to qemu-img.exe, which is in the folder where you installed QEMU.
“QEMU machines path” is the path where your virtual machines are stored. It is recommended that you should place this folder on a separate drive from your OS, so that QtEmu can create large disk images for your Virtual Machines.
Part 2: Installing and running Haiku from an ISO image
Step 1. Creating a virtual machine
When the .ISO image is ready, we can begin to create a new virtual machine (VM).
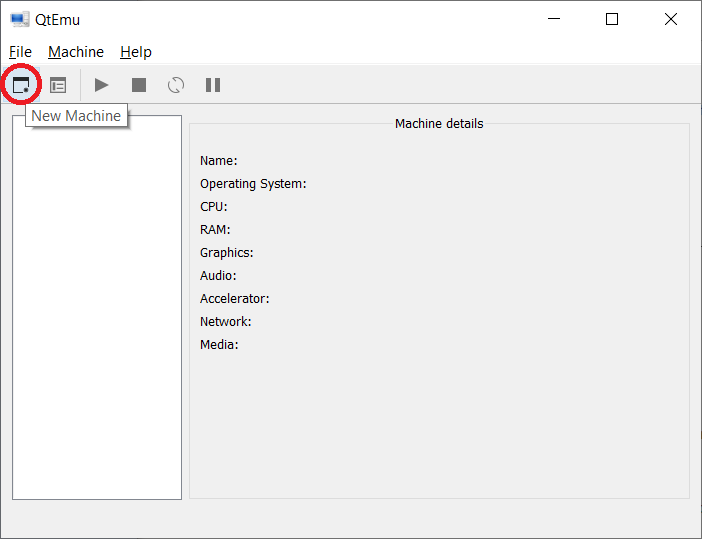
Start QtEmu, then click on the “New Machine” icon (or go to Machine -> New Machine). A window should pop up, guiding you through the process of creating a new VM.
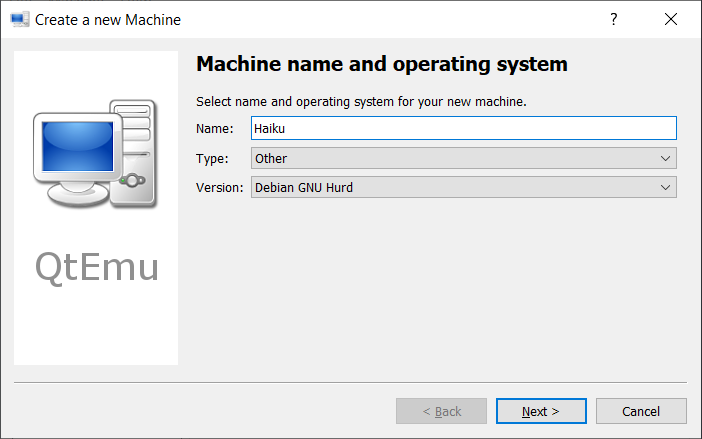
1. Machine name and operating system
In this dialog, we need to give our machine a name, as well as specify the operating system that we are going to install. This allows QEMU to optimize its machine for some popular OSes, and also to distinguish from your other VMs. As Haiku is not included in the list, we will choose “Other”. Once you’ve finished, click on “Next”.
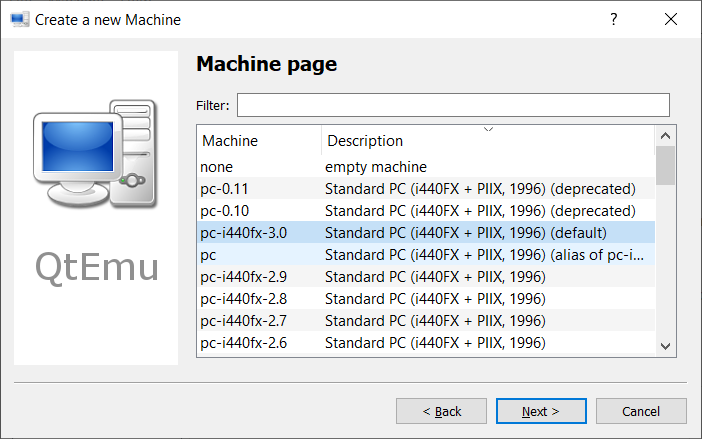
2. Machine page
You can choose your virtual PC type on this screen. If you don’t know what to select, just stick to the default and click “Next”.
3. Machine hardware
The next step is to configure the machine hardware:
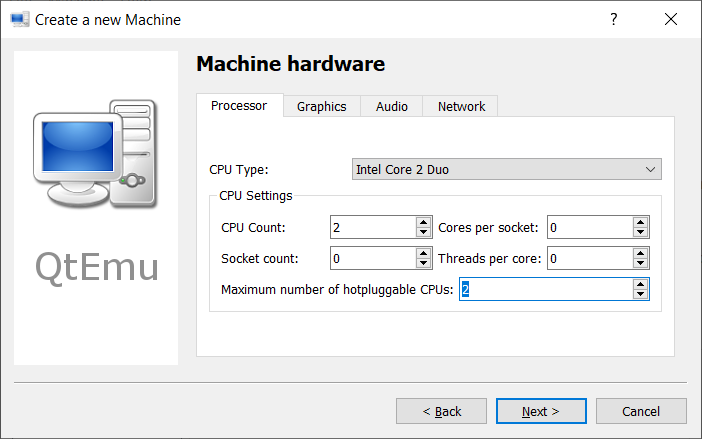
The processors must be configured in order to let QEMU and Haiku run properly. Some virtual CPUs can work on some machines, but give errors on others. “Intel Core 2 Duo” is recommended here, as it works for most computers, and Haiku runs smoothly on it.
Based on how many cores your processor has, you can increase the virtual CPU count. The number must be smaller than the number of your hardware CPU cores, or QEMU will produce errors.
Also, the “maximum number of hotpluggable CPUs” must not be smaller than the virtual CPU count.
The other tabs allow you to configure Graphics, Audio, and Network settings. If you have experience with virtualizing, you can change a few things here, but if you don’t, it is safer to leave these tabs alone.
When you’re finished, press “Next”.
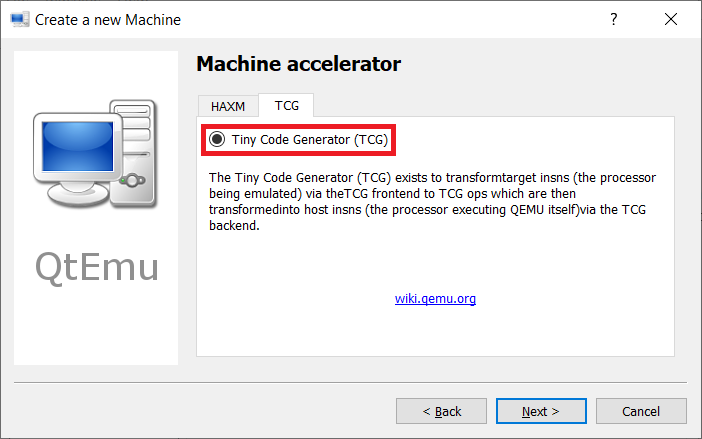
4. Machine accelerator
Here you choose your Machine Accelerator. HAXM is enabled by default, as it speeds up virtualization. However, this causes bugs in many machines. If HAXM is installed on your PC, you can press “Next” and move on.
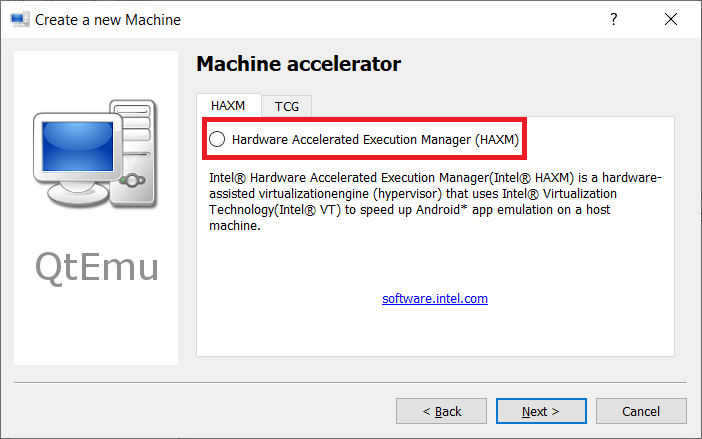
But if it is not, or if you are unsure, uncheck the HAXM option, then move to the TCG tab, and enable TCG.
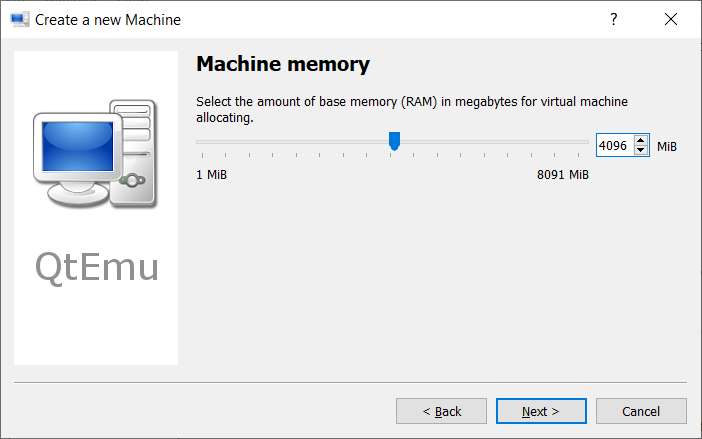
5. Machine memory
Next you set the amount of RAM allocated for your VM. The recommended amount is 3GB (as WebPositive alone can take 1GB of memory), but not more than half of your available RAM.
6. Machine virtual hard disk
Finally, we need to allocate space for the virtual disk. Select “Create a new virtual hard disk”, then press “Next”.
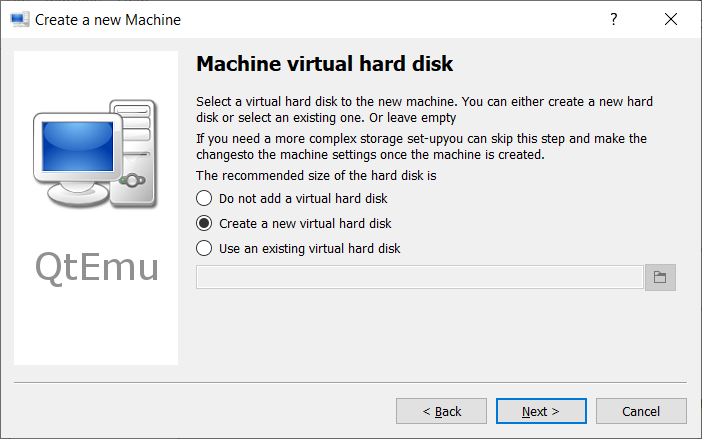
8GB of disk space is recommended for Haiku. Also, for portability, you can select the raw image type or VMWare disk image type (.vmdk).

7. Machine summary
When you’re done, your summary should look like this:
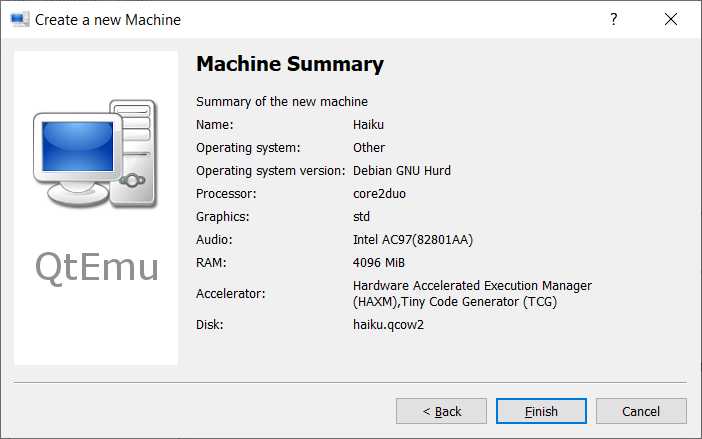
Press “Finish” to finish setup.
Step 2. Configuring Haiku boot image
We’re done with the hardware, but like in a real computer, you need to insert the Haiku setup CD to boot from the installation disk. Do this by clicking on the “Machine Settings” icon (or going to Machine -> Machine Settings)

In the new dialog box, navigate to “Media”, press on the “Add Optical Media” icon.
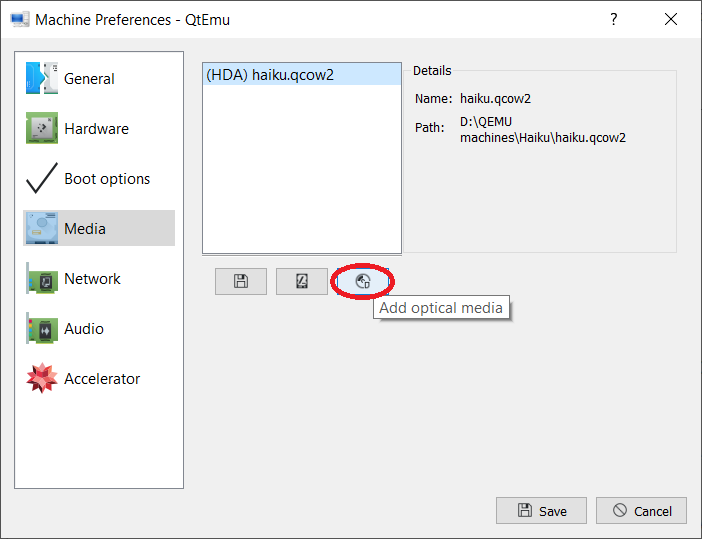
Then, navigate to the .ISO image that you have downloaded.
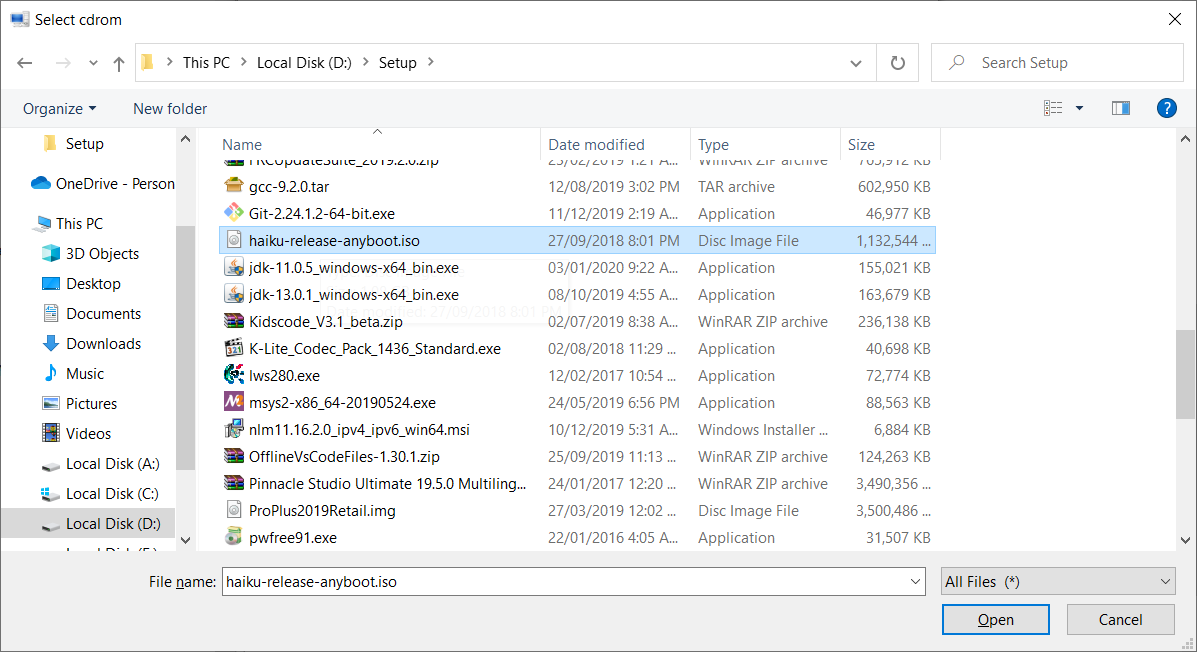
Press “Save” to finish configuring.
Step 3. Installing Haiku
Ok, our new machine is now ready to run! Press the “Start” icon to begin.
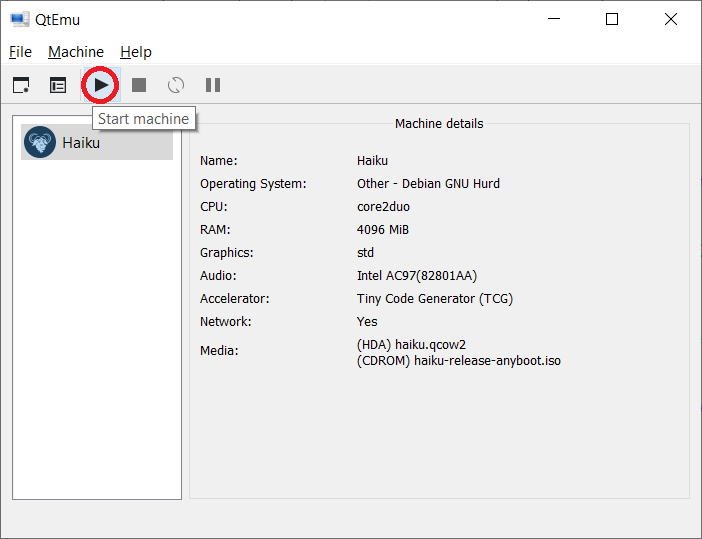
The VM should boot from the CD, and Haiku’s installer should open.
Follow this guide if you don’t know how to install Haiku.
In the DriveSetup page, two volumes should appear. The drive at port 0 should be our virtual hard drive. Press Disk -> Initialize to initialize it. You can choose either “Intel Partition Map” or “GUID Partition Map”, but the latter is better, and is supported by Haiku.

Once you have initialized the disk, follow the installation guide to format the partition. After that, close the DriveSetup window to continue.
The installation should finish in less than 5 minutes. When you’re done, click on “Restart” to restart your VM.
Here is a screenshot of Haiku on QEMU:
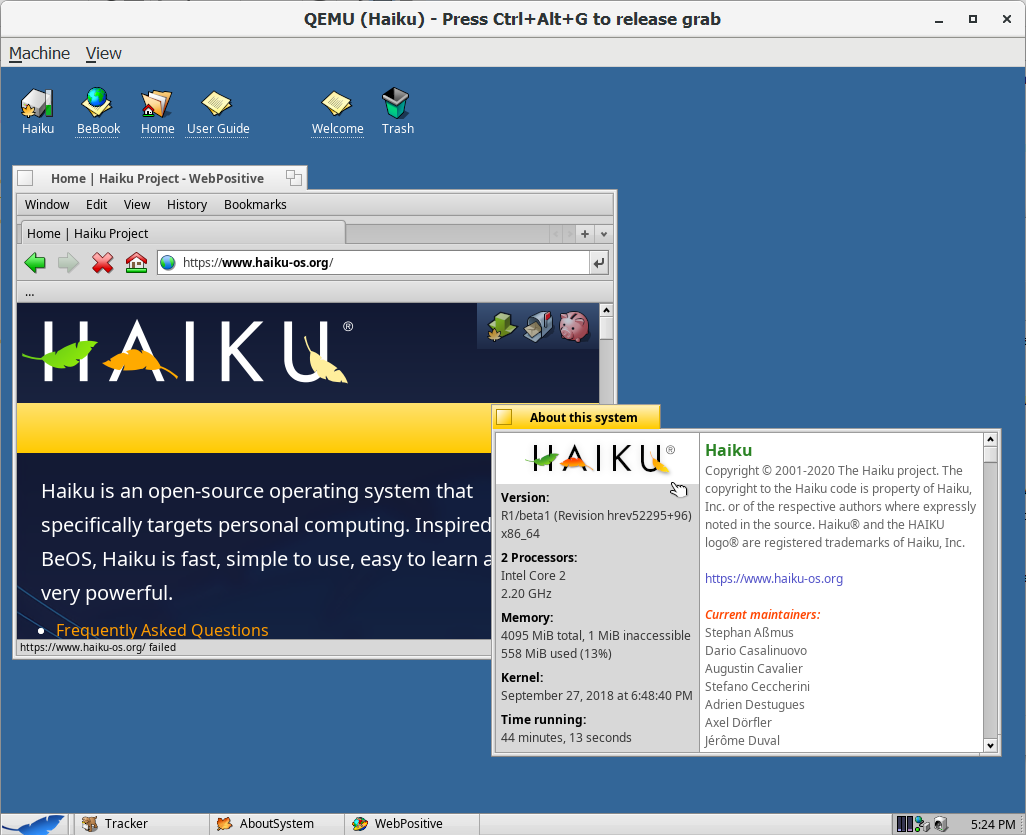
To let Haiku run fullscreen, press Ctrl+Alt+F. You should also change the screen resolution, but not larger than the host’s, else QEMU will produce bugs.
Part 3. Known issues
1. QEMU will not start after pressing the “Start machine” button
This is a known issue in Windows 10, as mentioned above, it may be related to HAXM. Read more here.
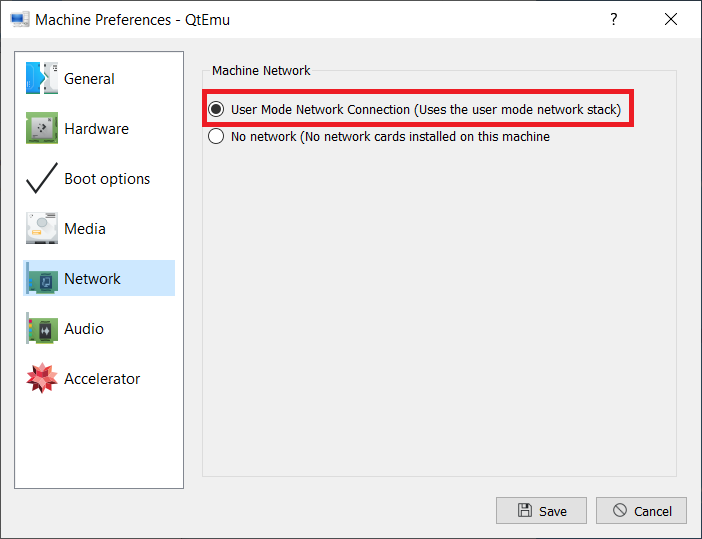
2. Network does not start
Try enabling “User Mode Network Connection” in “Machine Preferences”. If that does not work, re-installing Haiku may help.