


Emulating Haiku In ESXi
In 2017, Max Levchuk created a tutorial video for VMware ESXi [5 MiB].
Virtualizing an operating system might be a good way to give it a test run, or to use it alongside your main OS. ESXi is a platform that allows easy deployment of virtual machines on baremetal servers, and setting up a Haiku ESXi VM might be a good idea if you intend to develop Haiku or applications for it.
This guide assumes that you’ve already downloaded ESXi from VMWare’s website and installed it on your machine. I take no responsibility for any data loss you might encounter during the process and/or the tutorial.
Creating a virtual machine
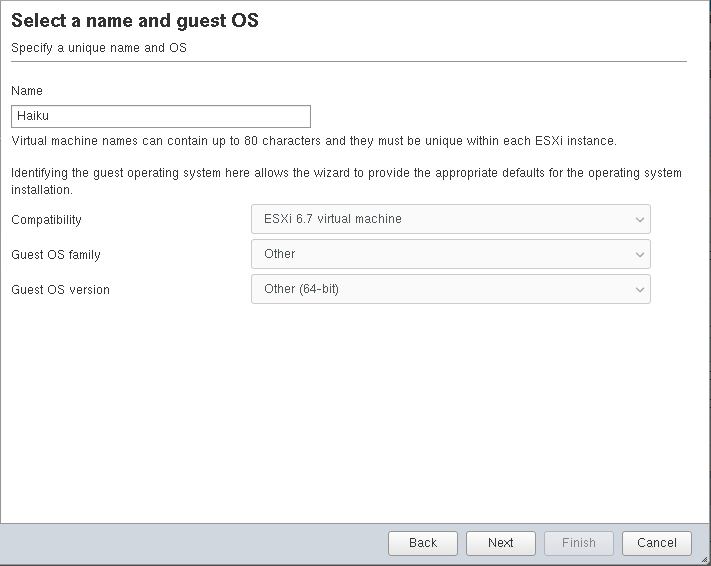
On the main ESXi screen, choose Create/Register VM, then choose Create a new virtual machine in the Select creation type window. In Select a name and guest OS, choose Other and Other (64-bit) as the Guest OS, the VM type can be left at default.
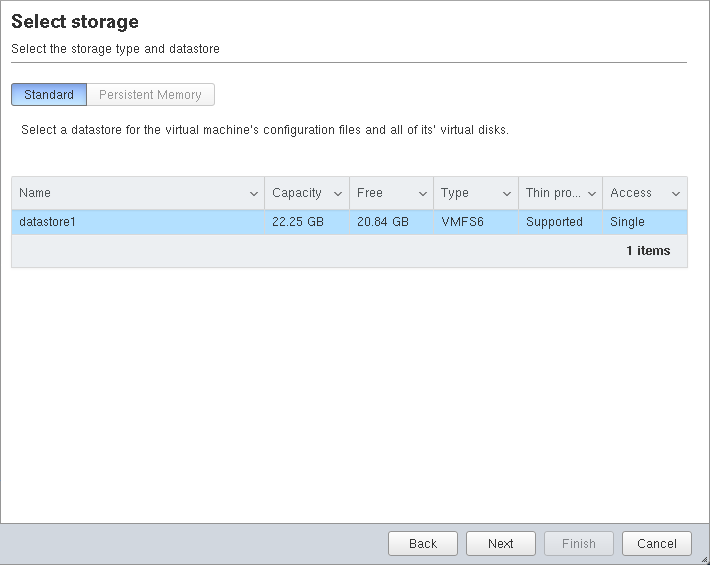
On the next screen, choose the HDD where the Virtual Machine should reside. If you have only one drive, this can be left default.
Remove the HDD, CD-ROM and both SCSI and SATA controllers, then re-add the HDD and CD-ROM, but attach them to IDE 0 controller as Master and Slave respectively.
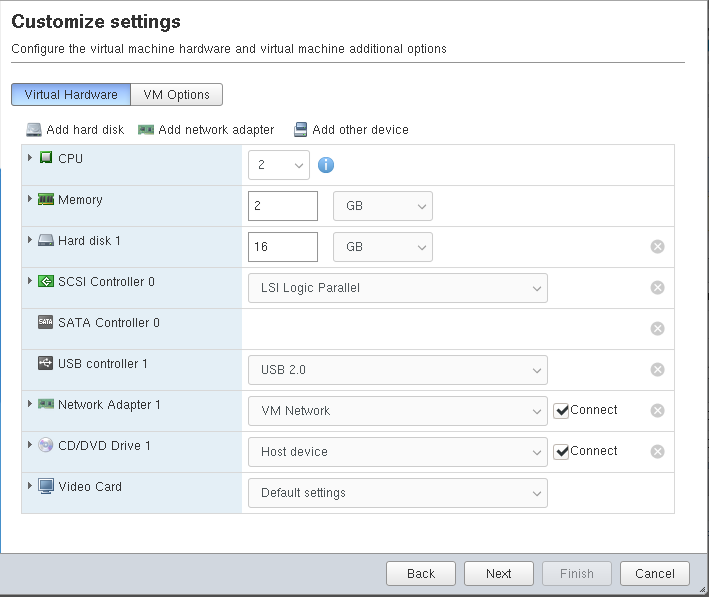
In this guide, I’ll set the machine up with recommended amount of HDD space and RAM according to the release notes - that’s 16GB of HDD space and 2GB of RAM. The minimal requirements are 3GB of HDD space and 384MB of RAM, but for most uses you’ll need more. Remember to leave at least 700MB of free space outside the virtual HDD for the installation ISO.
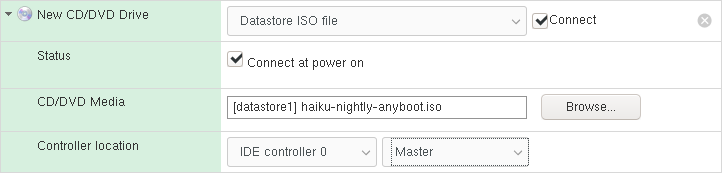
Before moving on to the next part, remember to change the CD-ROM from Host device to Datastore ISO file, and then upload your Haiku Anyboot ISO.
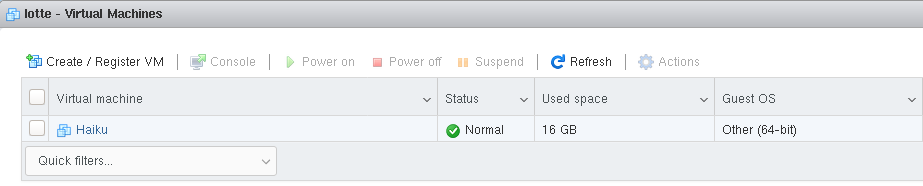
After completing the wizard, move to the Virtual Machines list. Your Haiku machine should be listed. Select it and press Power on, then click on the small screen preview to expand it to normal size. If you see the Haiku boot screen, then you configured everything correctly. If the loading stops on the block device icon (see picture below), Haiku failed to find the CD-ROM - check if you’re really using the IDE controller.

Installing VMRC
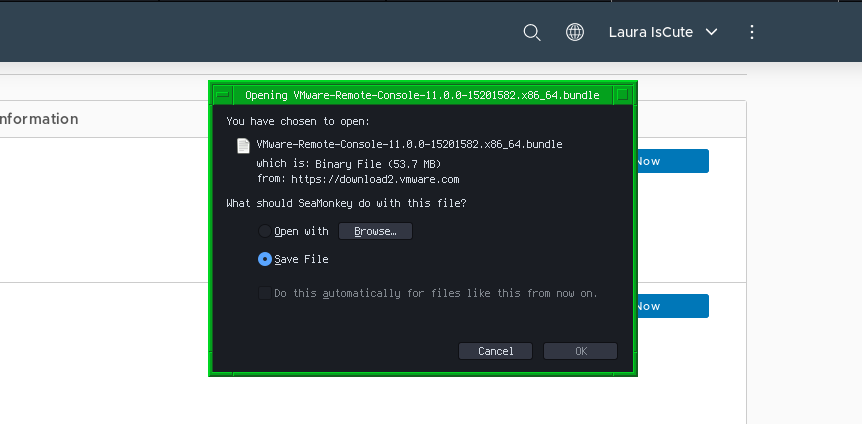
If you finally see the desktop, but the mouse seems frozen, fear you not. For some reason, ESXi’s web console fails to interface with Haiku’s mouse, so to actually use Haiku, a standalone remote desktop application is needed. Download VMWare Remote Console (VMRC) from VMWare’s website.
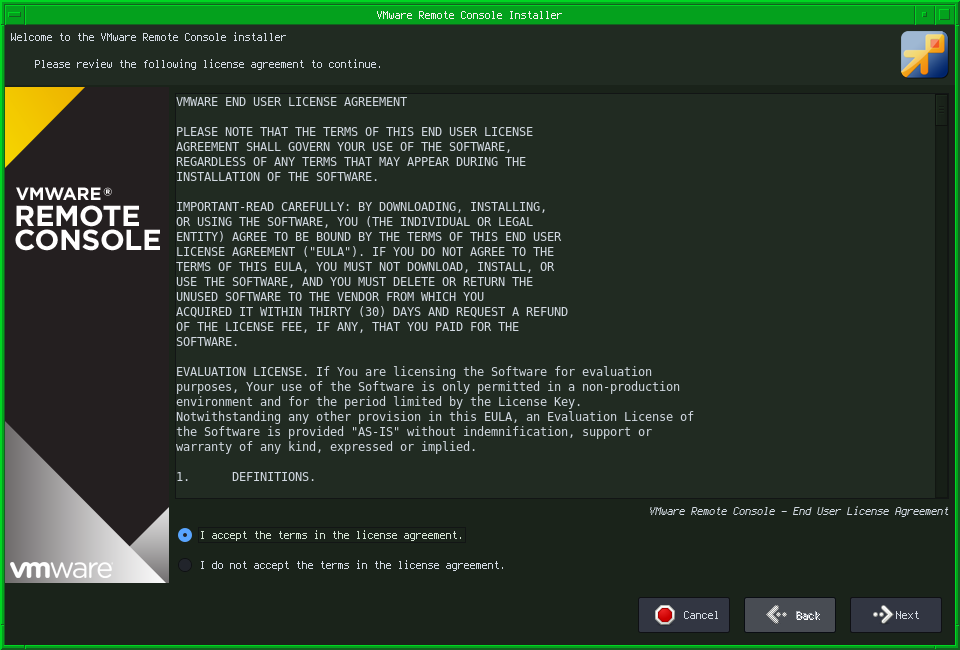
After downloading the executable, launch it and follow the setup wizard. If you’re on Linux or Mac, you might need to set the executable permission using chmod +x.
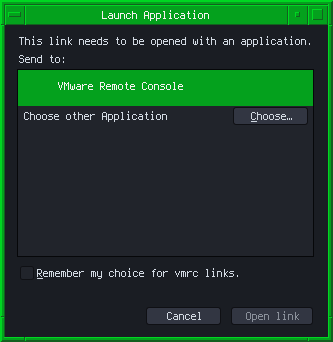
After installing VMRC, select the VM from the list, press the Actions button, and choose to launch VMRC.
Right away, VMRC will complain about an invalid security certificate, but you can just ignore it and press Connect Anyway. If everything goes smoothly, the machine should be fully accessible.
Installing Haiku
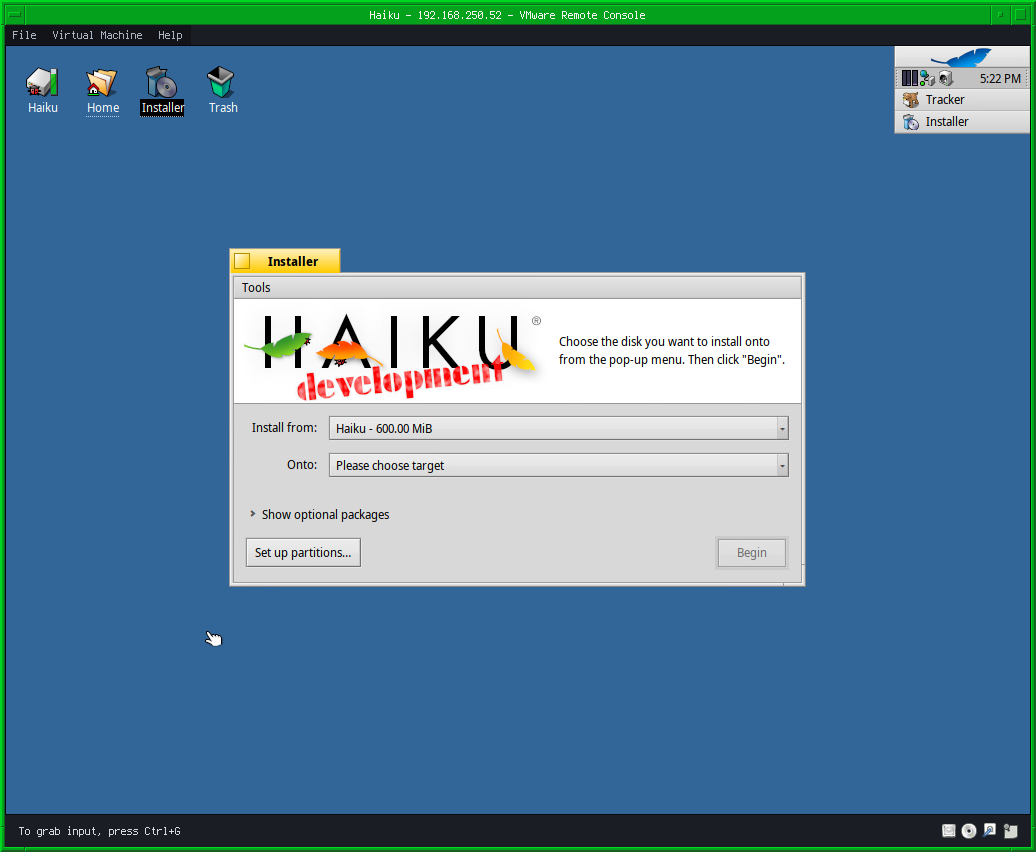
Before finally installing Haiku, you need to partition the virtual hard drive. Open the Haiku Installer and click on Set up partitions….
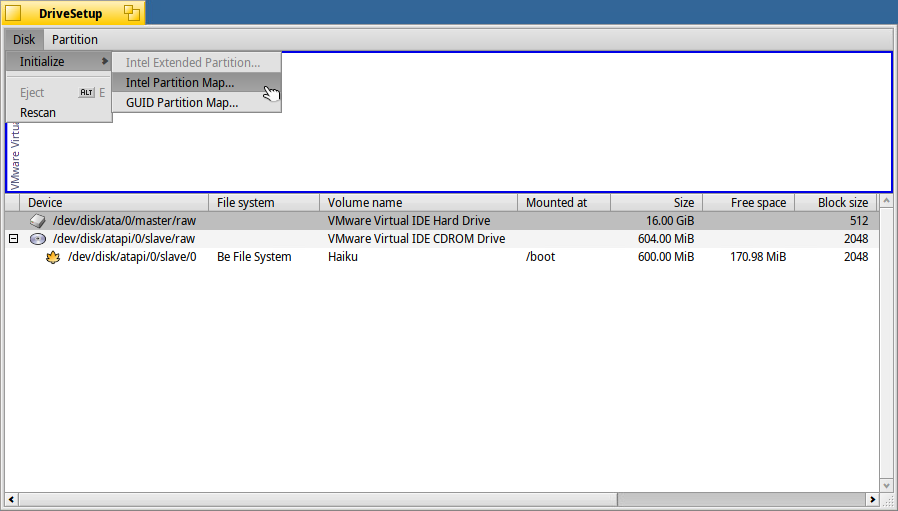
Firstly, init the hard drive with the Intel Partition map (otherwise known as MBR/dos). Remember to set the active flag, otherwise Haiku won’t boot.
Secondly, create a new partition with the BeOS type, it should occupy the whole drive.
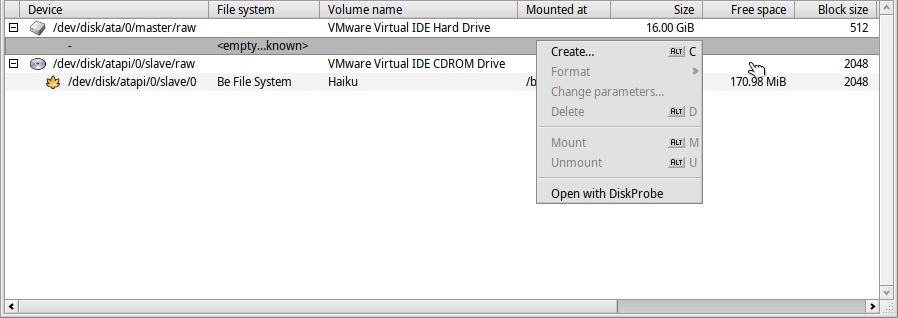
Before leaving the partitioner tool, format the partition as BeOS, then exit the partitioner, choose the partition and press Begin. Haiku will install automatically.
Before rebooting, you might want to remove the CD from the virtual drive - you can do it straight from the VMRC by clicking on the CD icon in the lower right corner of the window, then ejecting the CD.
Congratulations! You now have a fully working Haiku VM. The best thing to do now would be to configure your OS, enabling SSH for better remote control is a good start. ESXi will give your machine an IP in the real network even if your server has only one network card, thus you can easily connect to your machine from other computers in your network.
Changing any VM parameters can be done by shutting off the VM, and then entering the configuration via the ESXi web panel. Please note that ESXi won’t be able to shrink the virtual hard drive.